Data fetching with Next.js and Strapi CMS

An integral part of any application is the data that flows from one state of our app to another. This data may be static, from the file system, or, as is the case with many dynamic applications, from an external source.
In this tutorial, we’ll go over a few ways to handle data fetching in Next.js. We’ll use Strapi as a data source for the purpose of this tutorial, but there are many other sources you could use to achieve the same result.
All the code written in this tutorial is availalbe in the GitHub repo.
What is Next.js?
In simple terms, Next.js is a React framework for building highly dynamic applications. According to the official website, it comes out of the box with support for the following:
- Prerendering — you can choose to statically generate your pages at build time or server-render them on every request
- Zero configuration — automatic code-splitting, filesystem-based routing, and hot code reloading The first point is what we’ll focus on in this tutorial. But before we begin, a quick overview of Strapi.
What is Strapi ?
According to the official website, Strapi is an open-source, headless CMS that is “100% Javascript, fully customizable, and developer-first.”
With Strapi, you can build APIs and manage website content easily without sacrificing the flexibility to customize your experience.
Prerequisites
To follow along with this tutorial, you should have the following:
- A basic understanding of asynchronous JavaScript
- A basic understanding of React
- Node.js installed
Installation
To install Strapi globally, run the following.
yarn add global create-strapi-app
Run the command below to install Next.js globally.
yarn add global create-next-app
Scaffolding the backend
To begin, create a new directory for your project.
mkdir nextjs-strapi-data-fetching
cd into the new directory with this snippet:
cd nextjs-strapi-data-fetching
Next, scaffold a new Strapi app into a backend folder.
create-strapi-app backend --quickstart
This creates a new Strapi app in a folder called backend. The --quickstart flag tells Strapi to use SQLite as database of choice. To use a different database, you would omit the flag and select another database whem prompted.
Depending on your network speed, the installation might take a few minutes. Once that’s done, run the following snippet to start Strapi in development mode.
yarn develop
Your browser should automatically open on http://localhost:1337/admin/auth/register. If not, manually open it in your browser of choice.
Creating a new user
On this screen, you’ll see a registration form like the one below.
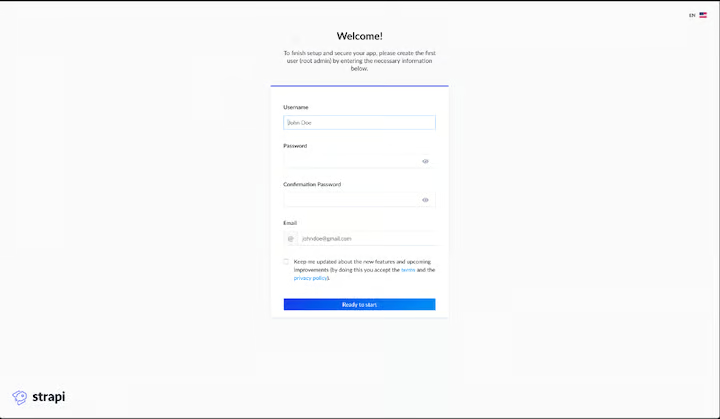
Go ahead and complete the form with your details. This step is required for subsequent logins to the admin dashboard.
The genres endpoint
At this point, your dashboard should look something like this:
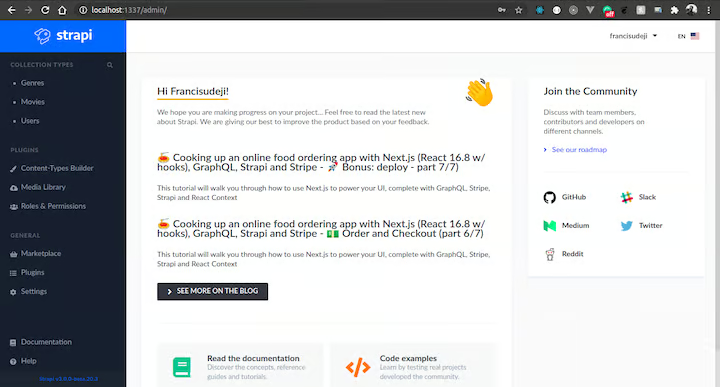
Your APIs are listed at the top-left corner of this page. For now, it should only include the Users API.
To create a new Genres endpoint, click “Content-Type Builder” on the sidebar. When redirected, click “Create new collection type” and give it a display name of “genre.” Note the singularity of the word; Strapi automatically pluralizes it.
The modal screen should look like this:
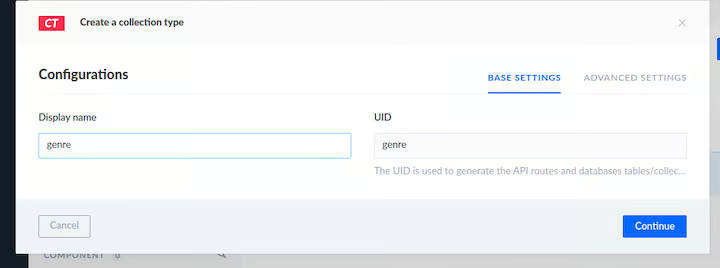
Clicking “Continue” should bring up another screen to select the fields for this collection. Choose the “Text” field from the list and give it name. Click “Advanced settings” and check the “Required field” box to ensure this field is required when creating a new genre.
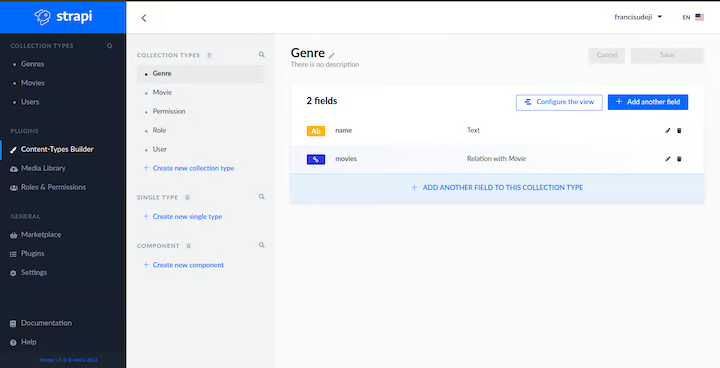
You’re done creating the genres endpoint. Easy, right? Don’t worry about the Movies field right now; we’ll get to that when we create the movies API.
The movies endpoint
To create movies API, you can follow the same steps you took to create the genres API. Only this time, you’ll need more fields.
The table below explains the fields for the movies API:
| Field Name | Type | Required | Unique |
|---|---|---|---|
| title | Short text | true | true |
| overview | Long text | true | false |
| cover | Single media | true | true |
| tagline | Short text | false | false |
| runtime | number | true | false |
| release_date | date | true | false |
| genres | relation | true | false |
For the genres field, after selecting relation as the type, choose the “Movies has and belongs to many Genres” relation as shown below.
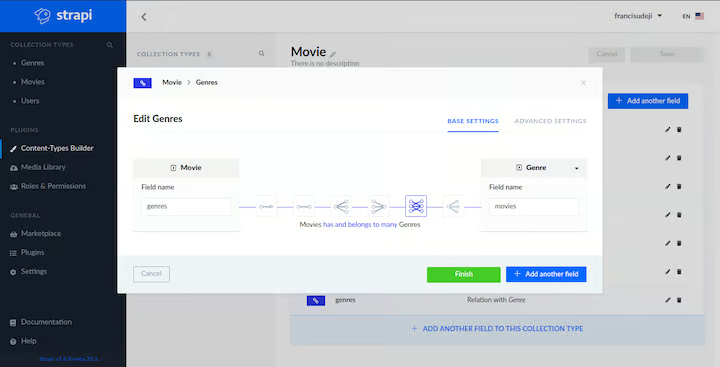
Now that you’ve created a relation between movies and genres, when you request for movies, you’ll also get the corresponding genres and vice versa.
Feel free to be as loose or strict with the required fields as you wish.
Adding data
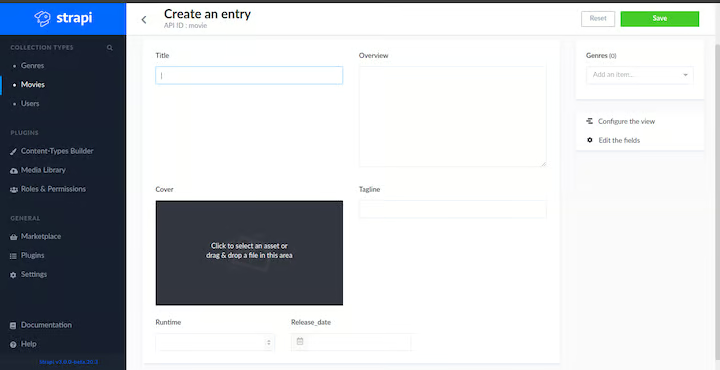
To add data to the database, simply select any of the APIs on the sidebar, click “Add new,” and fill in the details.
The genres screen should look this:

The movies screen should look this this:
Roles and permissions
By default, whenever you create an API, Strapi creates six endpoints from the name given to the API. The endpoints generated for movies should look like this:
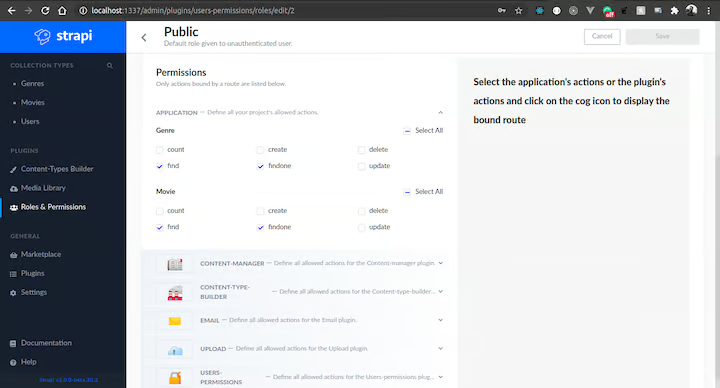
By default, they’re all going to restricted from public access. Now you need to tell Strapi that you’re okay with exposing these checked endpoints to the public. Go to Roles and Permissions > Public > Permissions and check find and findOne for both genres and movies.
You should have the following endpoints.
- Get all movies: http://localhost:1337/movies
- Get a single movie: http://localhost:1337/movies/:id
- Get all genres http://localhost:1337/genres, and
- Get a single genre: http://localhost:1337/genres/:id
Below are the genres I created in beforehand.
Strapi Genres Returned From Genres Endpoint If you’ve made this far, you’ve completed the backend section of this tutorial. Next, we’ll show you how to consume this data on the frontend.
Scaffolding the frontend
Before we begin, make sure you’re in the project root, cd into the project root with this snippet:
cd ..
Scaffold a new Next.js app into a frontend folder
create-next-app frontend
What this snippet does is create a new Next.js app in a folder called frontend. This may take a few minutes to install depending on your network speed.
Setting up Tailwind CSS
We’ll use Tailwind CSS to style this application. If you haven’t used it before, don’t worry; just follow along or bring your own styles. Thankfully, this is the only dependency you need to install for this tutorial.
To install Tailwind CSS, paste the following snippet.
yarn add tailwindcss
To import Tailwind CSS, open frontend/pages/_app.js and paste the following import statement at the top.
// frontend/pages/_app.js
import "tailwindcss/dist/tailwind.css";
The above command imports Tailwind CSS directly from node_modules. _app.js is a special file in Next.js that controls page initialization. This is suitable for adding global CSS to the entire website.
Run the following to start Next.js in development mode on http://localhost:3000.
yarn dev
Preparing the environment variables
Next.js has support for loading environment variables into your project. Simply create a .env.development file at the root of the frontend folder and paste in this snippet:
NEXT_PUBLIC_BASE_URL=http://localhost:1337
This will enable you to access this variable with process.env.NEXTPUBLIC_BASE_URL. It’s worth noting that this method exposes the variables in Node and the browser environment. Ideally, if you have secrets that do not need end up in the browser, then remove the NEXT_PUBLIC prefix.
Making asynchronous requests
Now is a good time to set up a utility function to handle all your fetch requests. Since you’ll be be using almost identical fetch requests in multiple places, it’d be nice if you could abstract that functionality.
Create a utils.js file in the frontend folder and paste in the following snippet.
//frontend/utils.js
const baseUrl = process.env.BASE_URL;
async function fetchQuery(path, params = null) {
  let url;
  if (params !== null) {
    url = `${baseUrl}/${path}/${params}`;
  } else {
    url = `${baseUrl}/${path}`;
  }
  const response = await fetch(`${url}`);
  const data = await response.json();
  return data;
}
export { baseUrl, fetchQuery };
This defines a new fetchQuery function that accepts a path and optional params. Those arguments are passed to the fetch function to fetch data from whatever path you specify and, finally, return some data.
Next, export the fetchQuery function and the base URL defined in the environment variable.
The layout component
In the Layout component, you want to create an app shell, if you will, to wrap around your pages with a shared header and some meta tags.
Create a components folder with a Layout.js file in it and paste the following.
// frontend/components/Layout.js
import Link from "next/link";
import Head from "next/head";

export default function Layout({ children, title, description }) {
  return (
    <>
      <Head>
        <meta name="description" content={description} />
        <title>{title}</title>
      </Head>
      <header className="bg-gray-900 border-b border-gray-700">
        <div className="container mx-auto px-3 xl:px-20">
          <div className="flex h-20 items-center justify-center">
            <Link href="/">
              <a className="text-red-500 text-4xl font-semibold">Next Movies</a>
            </Link>
          </div>
        </div>
      </header>
      <main className="bg-gray-900 min-h-screen">
        <div className="container mx-auto px-3 xl:px-20">{children}</div>
      </main>
    </>
  );
}
The code above creates a new component that accepts three props. The first prop is used to inject child components and the rest for setting the page title and description. It also returns some JSX that renders a header component with a link to the homepage and children passed in the props.
Server-side rendering on the homepage
Let’s zoom in on the fetching strategies we mentioned earlier. To demonstrate, we’ll use the getServerSideProps function to enable server-side rendering (SSR) on the homepage.
Start by removing the default content in the pages/index.js file and replace it with the following.
// frontend/pages/index.js
import Layout from "../components/Layout";
import { fetchQuery } from "../utils";
import { MovieCard } from "../components/MovieCard";

export default function Home({ movies }) {
  return (
    <Layout title="Next Movies" description="Watch your next movies">
      <section className="grid grid-cols-1 sm:grid-cols-2 py-10 gap-1 sm:gap-6 lg:gap-10 items-stretch md:grid-cols-3 lg:grid-cols-4">
        {movies.map((movie) => (
          <MovieCard key={movie.title} movie={movie} />
        ))}
      </section>
    </Layout>
  );
}

export async function getServerSideProps() {
  const movies = await fetchQuery("movies");
  return {
    props: {
      movies,
    },
  };
}
This imports the fetchQuery utility function you created earlier. You can see it in action in the getServerSideProps function. According to the official documentation, exporting an async function called getServerSideProps from a page causes Next.js to prerender the page on each request using the data returned by getServerSideProps.
The data, in this case, is all the movies we added when we built the API. Declaring this function means you must return a props`` object with some data, which means you’ll receive a movies` props on the current page.
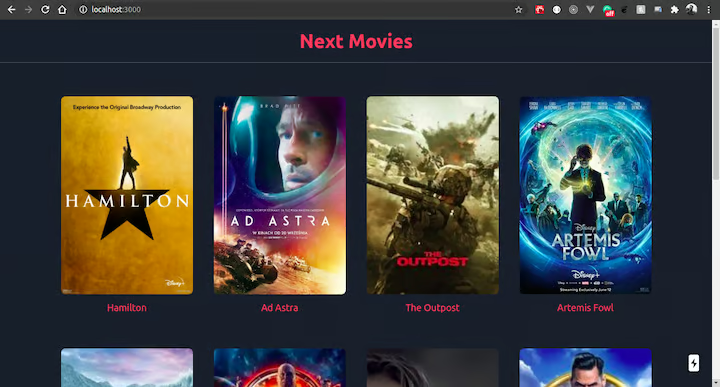
After receiving the movies props, loop through all of them and render with the MoviesCard component.
Here’s what the homepage should like:
The MoviesCard component
This is a separate component because you’re going to reuse it when you fetch movies by genre.
Create a MoviesCard file in the components folder and paste the following.
// frontend/components/MoiesCard.js
import Link from "next/link";
import { baseUrl } from "../utils";

export function MovieCard({ movie }) {
  return (
    <Link key={movie.title} href={`/movie/${movie.id}`}>
      <a className="flex flex-col overflow-hidden mt-6">
        <img
          className="block w-full flex-1 rounded-lg"
          src={`${baseUrl}${movie.cover.url}`}
          alt={movie.title}
        />
        <h2 className="text-red-500 mt-3 text-center justify-end text-lg">
          {movie.title}
        </h2>
      </a>
    </Link>
  );
}
This renders a link with the movie cover and title. When you click on the link, you should be redirected to a single movie page. So now let’s create it.
Statically rendering the single movie page
During this stage, we’ll explore two prefetching strategies: getStaticProps and getStaticPaths. getStaticProps is similar to the getServerSideProps function in terms of function definition, but they differ in how they work. If you export an async function called getStaticProps from a page, Next.js will prerender this page at build time using the props returned by getStaticProps.
In addition to using getStaticProps, if the page is dynamic, you also need to add a getStaticPaths function to define all the paths that need to be generated at build time.
Create a new page called [movieId].js in frontend/pages/movie. Next.js treats any file surrounded by square brackets as a dynamic route. If you navigate to http://localhost:3000/movie/1, it will be matched to this page and you can do what we want with the parameter.
Paste the following to get started.
// frontent/pages/movie/[movieId].js
import Layout from "../../components/Layout";
import Link from "next/link";
import { baseUrl, fetchQuery } from "../../utils";
export default function Movie({ movie }) {
return (
<Layout title={movie.title} description={movie.overview}>
<div className="pt-6">
<Link href="/">
<a className="text-red-500">← Back to home</a>
</Link>
</div>
<section className="flex flex-col md:flex-row md:space-x-6 py-10">
<div className="w-full md:w-auto">
<img
className="rounded-lg w-full sm:w-64"
src={`${baseUrl}${movie.cover.url}`}
alt={movie.title}
/>
</div>
<div className="w-full md:flex-1 flex flex-col mt-6 md:mt-0">
<div className="flex-1">
<h2 className="text-white text-2xl font-semibold">
{movie.title}{" "}
<span className="text-gray-400 font-normal">
({new Date(movie.release_date).getFullYear()})
</span>{" "}
</h2>
<span className="text-sm text-gray-400 block mt-1">
{movie.tagline ?? ""}
</span>
{movie.genres.map((genre) => (
<Link key={genre.name} href={`/genre/${genre.id}`}>
<a className="rounded-lg inline-block mt-3 text-xs py-1 uppercase tracking wide px-2 bg-red-500 text-white mr-2">
{genre.name}
</a>
</Link>
))}
<p className="text-white text-lg mt-5">{movie.overview}</p>
</div>
<div className="flex sm:items-center flex-col sm:flex-row sm:space-x-6 mt-6 md:mt-0">
<div className="flex items-end">
<p className="text-white uppercase text-sm tracking-whide">
Released on:
</p>{" "}
<time
className="pl-2 text-sm uppercase tracking-wide text-gray-400"
dateTime={movie.release_date}
>
{new Date(movie.release_date).toDateString()}
</time>
</div>
<div className="flex items-end mt-3 sm:mt-0">
<p className="text-white uppercase text-sm tracking-whide">
Runtime:
</p>
<span className="pl-2 tracking-wide uppercase text-xs text-gray-400">
{movie.runtime} mins
</span>
</div>
</div>
</div>
</section>
</Layout>
);
}
export async function getStaticProps({ params }) {
const movie = await fetchQuery("movies", `${params.movieId}`);
return {
props: {
movie,
},
};
}
export async function getStaticPaths() {
const movies = await fetchQuery("movies");
const paths = movies.map((movie) => {
return {
params: { movieId: String(movie.id) },
};
});
return {
paths,
fallback: false,
};
}
Let’s break down this code snippet.
We first fetched a single movie and returned it as props using the movieId passed in the URL in the getStaticProps function.
We fetched all the movies in the getStaticPaths and returned a paths array of objects containing the movieId for each movie. This means Next.js will generate the paths /movie/1, movie/2, … /movie/n .
It should look something like this (note that the param must be the same name as the file):
paths: [{ params: { movieId: 1 } }, { params: { movieId: 2 } }];
The fallback key is required. If it’s set to false, Next.js will return a 404 for any page that was not statically generated at build time. On the other hand, if set to true, Next.js will statically generate the raw HTML for that page.
Note: If you do this on the fly, there might be some delay since that page was not statically generated at build time. It’s advisable to check whether the requested path is served by a fallback version. Learn more about handling fallback pages.
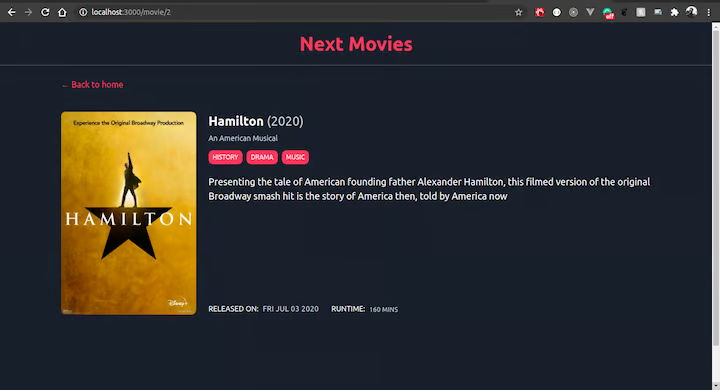
Finally, we rendered the single movie on the page with all the information about that movie.
Here’s what the single movie page looks like:
Building the genres page
This should be straightforward because we’re going to repeat what we did on the Home page and the single Movie page; Fetch all, then render.
To begin, create a new page in the pages folder called genres.js, then paste this snippet:
// frontend/pages/genres.js
import Layout from "../components/Layout";
import { fetchQuery } from "../utils";
import Link from "next/link";
export default function Genres({ genres }) {
return (
<>
<Layout
title="Movies Genres"
description={`Watch your next movies from ${genres.length} genres`}
>
<div className="pt-6 flex items-center space-x-3">
<Link href="/">
<a className="text-red-500">← Back to home</a>
</Link>
</div>
<section className="grid grid-cols-1 space-y-6 sm:space-y-0 sm:grid-cols-2 py-10 gap-1 sm:gap-6 lg:gap-10 items-stretch md:grid-cols-3 lg:grid-cols-4">
{genres.map((genre) => (
<div key={genre.name} className="flex flex-col">
<Link href={`/genre/${genre.id}`}>
<a className="rounded-lg shadow-lg bg-gray-800 px-3 py-10 flex items-center justify-center text-center text-red-500 text-3xl">
{genre.name}
<br />({genre.movies.length})
</a>
</Link>
</div>
))}
</section>
</Layout>
</>
);
}
export async function getStaticProps() {
const genres = await fetchQuery("genres");
return {
props: {
genres,
},
};
}
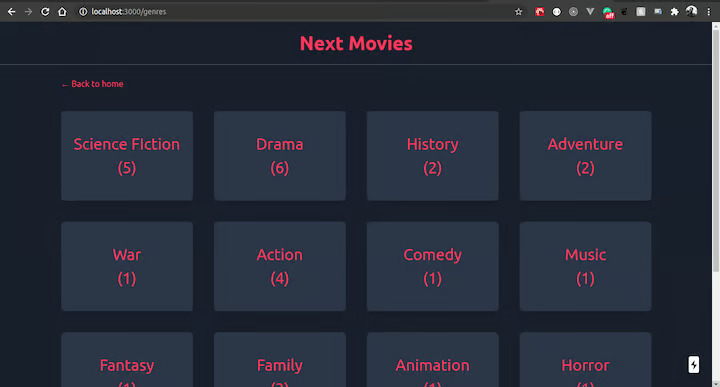
In this snippet, we’re doing something similar to what we did with getServerSideProps on the homepage. This difference is that this time the goal is not to SSR the page but to generate all the HTML for the genres at build time.
Here’s what the genres page should look like:
Statically rendering the single genre page
Like with the single movie page, you need to export not just the getStaticProps function, but also the getStaticPaths function.
Create a [genreId].js file in frontend/pages/genre and paste the following snippet.
// frontend/pages/genre/[genreId].js
import Layout from '../../components/Layout'
import Link from 'next/link'
import { fetchQuery } from '../../utils'
import { MovieCard } from '../../components/MovieCard'

export default function Genre({ genre }) {
  return (
    <Layout
      title={`${genre.name} movies`}
      description={`Watch ${genre.name} movies`}>
      <div className='pt-6 flex items-center space-x-3'>
        <Link href='/'>
          <a className='text-red-500'>Home ></a>
        </Link>
        <Link href='/genres'>
          <a className='text-red-500'>genres ></a>
        </Link>
        <Link href={`/genres/${genre.id}`}>
          <a className='text-red-500'>{genre.name}</a>
        </Link>
      </div>
      <section className='grid grid-cols-1 sm:grid-cols-2 py-10 gap-1 sm:gap-6 lg:gap-10 items-stretch md:grid-cols-3 lg:grid-cols-4'>
        {genre.movies.map((movie) => (
          <MovieCard key={movie.title} movie={movie} />
        ))}
      </section>
    </Layout>
  )
}
export async function getStaticProps({ params }) {
  const genre = await fetchQuery('genres', `${params.genreId}`)
  return {
    props: {
      genre
    }
  }
}
export async function getStaticPaths() {
  const genres = await fetchQuery('genres')
  const paths = genres.map((genre) => {
    return {
      params: { genreId: String(genre.id) }
    }
  })
  return {
    paths,
    fallback: false
  }
}
To recap, we fetched a single genre with the param passed in the URL inside the getStaticProps, which returns the genre with that ID.
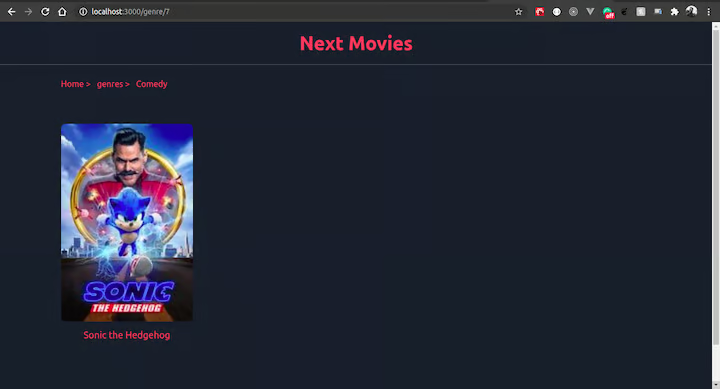
Then, we informed Next.js about all the paths to be generated at build time in the getStaticPaths function and passed a fallback option of false because we know we have a finite amount of data that doesn’t change very often.
Here are all the movies that have a genre of comedy:
Conclusion
In this tutorial, we demonstrated how to build APIs with Strapi, how to manage the content of those APIs, and how to handle roles and permissions. We then looked at the different data fetching strategies for both server-side rendering (SSR) and static site generation (SSG).
In closing, I challenge you to go a step further by adding other fields to the API and enabling the fallback option to see how it works when new data is added on the backend.